The Making of a Wedding Cake
I thought that it would be more interesting to dedicate one post to detailing the entire process of making my first wedding cake, rather than posting pictures every time I worked on it (because, honestly, I kept forgetting to take pictures anyway...).
This is actually my second wedding cake. The first was miniature and a collaboration between myself, my brother, and my bestest buddy growing up, when I was maybe 11 or 12? It included an icing rose under a wine glass between the tiers - it was pretty fancy... If I could find a picture of it, I'd show you. But that one was mostly my friend's design which I helped execute. This cake, on the other hand, is not real and is all my design and work! :)
So, as previously mentioned in other posts, to begin constructing the cake, we first had to come up with a design, and decide what size/how many tiers (but not more than 3), etc. I had a vague idea of what I wanted to do, but after looking for petal cutters to make flowers, and looking for piping designs and not finding one particular thing I liked... it took me a while to come up with my actual design. But, once a general design was conceived, we then cut our cake dummies out of dense styrofoam (actually, the teacher cut them out, with an electric saw) and sanded them to get them as smooth as possible, and round off the top edges. I settled on a three tier round design, with 10", 8" and 6" tiers.
The next step was to mask the styrofoam dummies with royal icing, still trying to get it as smooth as possible, but not worrying too much about it; because once the royal icing dries (rock hard), we sanded the dummies again. Now comes, I think, the trickiest part (aside from the design :P) - rolling out the fondant and covering the cakes. I had little difficulty with the white tiers, but when I decided to add colour to the third tier, things got a little cray-cray. In the end I succeeded, with some help from the teacher. Also, we coated the sanded, frosted cake dummies with sugar gel to help the fondant stick. Had this been a real cake, most likely it would have been masked with buttercream, and the fondant would just stick to that.
 |
| Royal icing |
 |
| Fondant |
Now comes the fun part - decorating. Aside from not being able to settle on a specific design for the longest time, I really enjoyed this part. I love artsy things and decorating, especially dessert things. Making the roses and painting the focal tier were probably my favourite parts, and it shows. Figuring out what to do with the rest of the cake was a little more difficult. There are so many designs out there to inspire, but I wanted it to fit with my focal tier and my roses... I'm still not sure that it all works together as well as it should, but anyway... It's done, it is what it is. As always, I could have done better, but I'm relatively satisfied with the end results. For a first-time attempt. ;)
I wanted to be able to try and showcase several different decorating techniques that I've been seeing on the Internet over the summer: hand painting on cakes, brush embroidery, and string work. And of course, flowers. In the end I didn't include brush embroidery because I couldn't come up with a design to fit the rest of the cake (but probably I could have done anything and it wouldn't look any weirder than it already does :P).
I wanted to make the middle tier what I call my "focal tier" because I wanted to try hand painting on that one. In the beginning I thought I might leave it white like the others and hand paint some kind of vignette or cameo on the front. But then I decided to cover it with light blue fondant and paint small pink roses all over it. And that turned out really cool.
 |
| Focal tier - hand painting |
I wanted the other two tiers to have string work and some kind of piping that worked with roses - either a rose motif, or something feminine and lacy. I wasn't sure if I wanted them to be completely covered with a piping design, or just have a pattern around the top, or top and bottom... I really only decided when I had the cone of icing in my hand. And even at that, the morning of the day I finished it (last Friday), I was still debating adding something else because I felt they were missing something. Still kinda do...
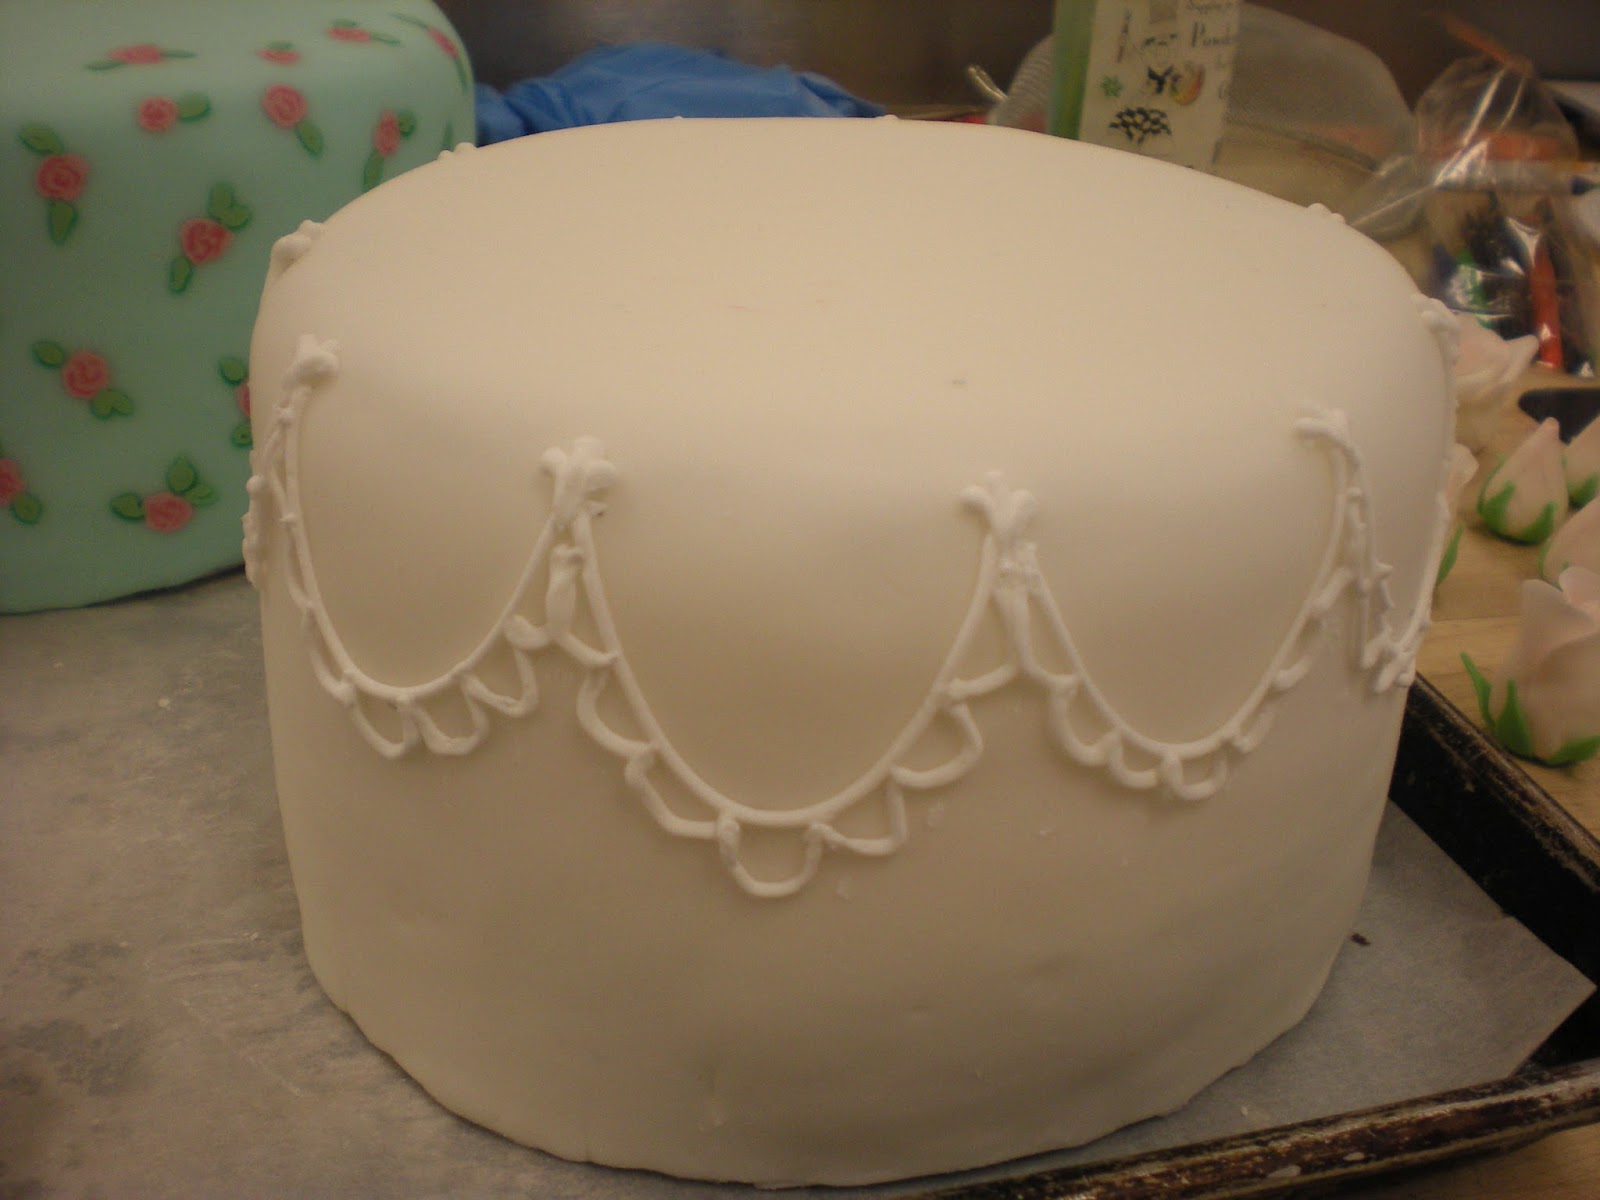 |
| 6" tier with lacy string work |
 |
| 10" tier with lacy string work |
Definitely need more practice in the piping/string work department...
So that's the cakes themselves. The only other decoration was piped borders, and my roses and leaves. I didn't take pictures of the process, or the leaves before I coloured them, but it was fun once I got the hang of it. Originally I thought I would just do white roses because that seemed easiest and I thought it would fit the theme better... and maybe I should have stuck with that. But I decided to lightly colour them with pink pearl dust. It transformed them, gave them so much more life, so I was really happy with them at that point.
 |
| The first ones I made with the school's recipe for gumpaste |
 |
| Bad lighting - they were as white as the ones above. Made with Wilton gumpaste from powder. |
 |
| After adding some colour and calyxes |
The leaves, which I didn't take pictures of before adding to the cake, I made with the same white gumpaste, and dried them over a rolling pin or around the edge of a bowl turned upside down. After they dried, I airbushed both sides with two tones of green. Airbrushing gave them a slightly shiny and more realistic look. It was my first time really using the airbrush for anything artistic.
And, well, that's it! After stacking them, I made a simple white shell border around each tier with a star tip. I felt I needed a bit of height on the top to add my flowers to, so I made a little dome of fondant and carefully glued the flowers and leaves to it with royal icing - a very delicate task! And kind of tricky, since they were all made individually, so they didn't really fit together, you know? Anyway, here's the final product. As I said, I'm satisfied, I think it's all pretty good work, but I'm disappointed with the overall outcome once I put everything together. And the more time passes, the more disappointed I am. The life of a perfectionist.

 |
| Photo courtesy of Sandra |


Comments
Post a Comment